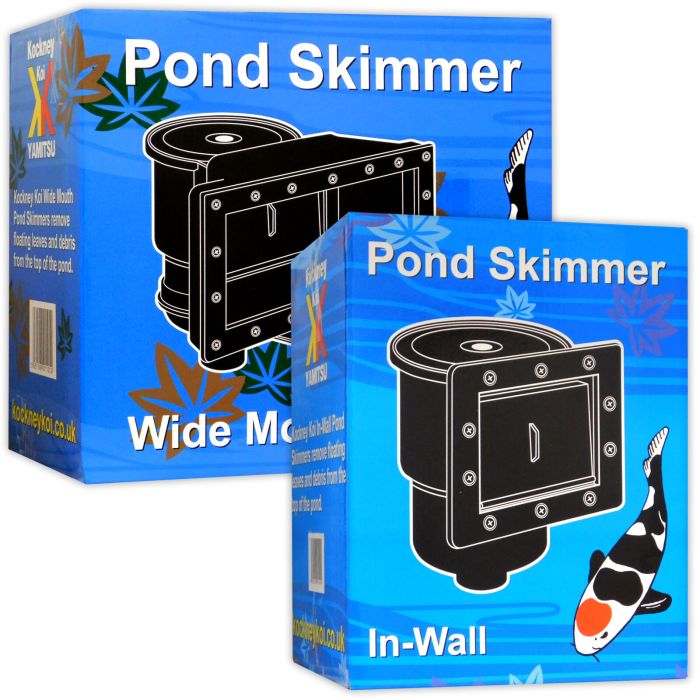
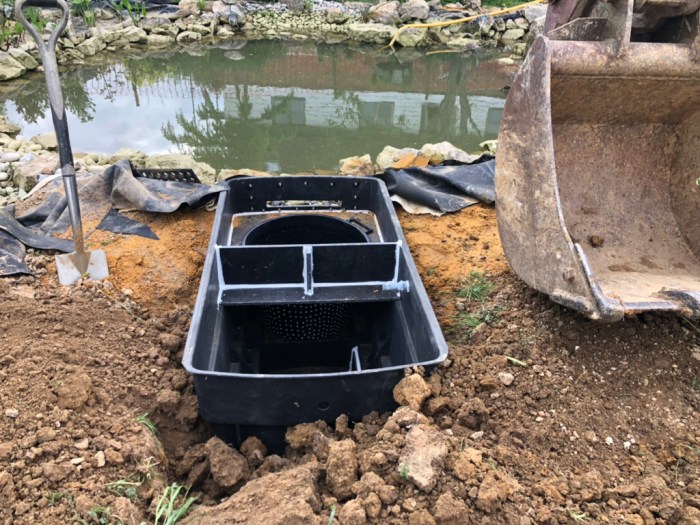
DIY Pond Skimmer: Dive into the world of pond maintenance with a DIY pond skimmer, a cost-effective and rewarding project that can enhance the beauty and health of your water feature. Whether you’re a seasoned pond enthusiast or a beginner, building your own skimmer offers a sense of accomplishment and allows you to customize it to perfectly fit your pond’s needs.
Table of Contents
Pond skimmers are essential for maintaining water clarity by removing debris and leaves that accumulate on the surface. A DIY pond skimmer can be a much more affordable option compared to commercially available skimmers, and it allows you to tailor the design and functionality to your specific pond environment.
Types of DIY Pond Skimmers

Building a DIY pond skimmer can be a rewarding project for any pond owner, and there are many different types of skimmers you can create, each with its own advantages and disadvantages. These DIY skimmers can help remove debris from your pond surface, improving water quality and aesthetics.
Surface Skimmers
Surface skimmers are the most common type of DIY pond skimmer. They work by skimming the surface of the water, collecting debris like leaves, insects, and other floating matter.
- Simple Bucket Skimmer: This is the simplest type of surface skimmer. You can create it using a bucket, a piece of PVC pipe, and a small pump. The pump draws water from the pond surface into the bucket, where the debris settles. The clean water is then returned to the pond.
- Floating Skimmer: A floating skimmer uses a mesh net or screen attached to a floating platform. The net traps debris as the platform floats on the water’s surface. These skimmers are relatively easy to build and can be moved around the pond as needed.
- DIY Box Skimmer: A DIY box skimmer can be made using a plastic storage container, a pump, and a filter. The container is partially submerged in the pond, with the pump drawing water through a filter that traps debris. The filtered water is then returned to the pond.
DIY Pond Skimmer Construction

Building a DIY pond skimmer can be a rewarding project, allowing you to customize a solution for your specific needs. It can also be a cost-effective alternative to commercially available skimmers.
Materials Needed
The materials you’ll need for constructing a DIY pond skimmer will vary depending on the design you choose. However, some common materials include:
- PVC pipe: This forms the base of the skimmer and can be cut to your desired size. You’ll need different sizes depending on the design.
- PVC fittings: These are used to connect the different sections of the PVC pipe and create the desired shape.
- Mesh screen: This traps debris and prevents it from entering the skimmer. You can use a fine-mesh screen for smaller debris or a coarser mesh for larger debris.
- Silicone sealant: This is used to create a watertight seal between the PVC pipe and the mesh screen.
- Water pump: This is used to draw water into the skimmer and then pump it back into the pond.
- Hose: This connects the water pump to the skimmer and the pond.
- Clamps: These are used to secure the hose to the pump and skimmer.
- Other materials: Depending on your design, you may need additional materials such as wood, metal, or plastic.
Construction Steps
Constructing a DIY pond skimmer involves cutting, assembling, and sealing the different components. The specific steps will vary depending on the design you choose, but the general process involves the following:
- Cut the PVC pipe: Using a PVC pipe cutter, cut the pipe to the desired lengths for the different sections of the skimmer.
- Assemble the PVC components: Connect the different sections of the PVC pipe using PVC fittings. You may need to use glue or solvent cement to create a permanent bond.
- Attach the mesh screen: Secure the mesh screen to the opening of the skimmer using silicone sealant. Ensure the mesh screen is properly positioned and secured to prevent debris from bypassing it.
- Install the water pump: Connect the water pump to the skimmer using the hose. Secure the hose with clamps to prevent leaks.
- Test for leaks: Before placing the skimmer in the pond, test for leaks by filling the skimmer with water and checking for any leaks.
- Place the skimmer in the pond: Once you’ve ensured the skimmer is watertight, place it in the pond and connect the hose to the pond.
Tips for a Sturdy and Watertight Construction
- Use high-quality PVC pipe and fittings: This will ensure the skimmer is durable and can withstand the weight of the water.
- Apply silicone sealant liberally: This will create a strong and watertight seal between the PVC pipe and the mesh screen.
- Secure all connections properly: Use clamps to secure the hose to the pump and skimmer, and ensure all PVC fittings are properly connected.
- Test for leaks regularly: After installation, check for leaks regularly, especially after cleaning or maintenance.
Maintenance and Troubleshooting: Diy Pond Skimmer
Just like any other piece of equipment, your DIY pond skimmer requires regular maintenance to ensure optimal performance. This involves cleaning, inspecting, and addressing any potential issues that may arise. By dedicating a little time to these tasks, you can keep your skimmer running smoothly and effectively, maximizing its ability to remove debris and keep your pond water clean.
Regular Cleaning and Debris Removal
Regular cleaning and debris removal are crucial for maintaining a DIY pond skimmer’s efficiency. The skimmer’s net, basket, and pump need to be cleaned regularly to prevent clogging and ensure proper water flow.
- Skimmer Net: The skimmer net is the first line of defense against debris entering the skimmer. It should be cleaned regularly, at least once a week, depending on the amount of debris in your pond. Simply remove the net from the skimmer, rinse it with a garden hose, and remove any accumulated debris.
- Skimmer Basket: The skimmer basket collects larger debris that passes through the net. It should be emptied and cleaned at least once a week. Remove the basket from the skimmer, empty the debris, and rinse it with a garden hose.
- Pump: The pump is the heart of the skimmer, and it needs to be kept clean to operate efficiently. Check the pump impeller for any debris buildup, and clean it with a brush if necessary. Also, check the pump’s intake for any blockages.
Troubleshooting Common Issues, Diy pond skimmer
Here are some common issues that may arise with DIY pond skimmers and how to troubleshoot them:
- Reduced Water Flow: If you notice a reduction in water flow through the skimmer, the most likely culprit is a clogged net, basket, or pump. Check each component for debris buildup and clean as needed.
- Noisy Operation: A noisy skimmer usually indicates a problem with the pump. Check for debris buildup on the impeller or pump intake. If the pump is still noisy after cleaning, it may be time to replace it.
- Leaking Skimmer: A leaking skimmer could be caused by a loose connection or a crack in the skimmer housing. Check all connections and look for any cracks or damage. If you find a crack, you may need to replace the skimmer housing.
DIY Pond Skimmer Safety
Building and installing a DIY pond skimmer can be a rewarding project, but it’s crucial to prioritize safety throughout the process. Improper construction or installation can lead to accidents and injuries. By following these safety tips, you can minimize risks and enjoy a safe and functional DIY pond skimmer.
Potential Hazards and Mitigation
It’s essential to be aware of potential hazards associated with DIY pond skimmer construction and installation. Here are some common risks and how to mitigate them:
- Electrical hazards: Using electrical tools near water poses a significant risk of electrocution. Always use tools with a ground fault circuit interrupter (GFCI) and ensure all electrical connections are properly insulated and protected from water contact. Avoid working with electrical components during wet weather or when the pond is filled with water. Additionally, ensure that all electrical components are rated for outdoor use.
- Sharp edges and tools: Working with metal and sharp tools can result in cuts and injuries. Wear appropriate safety gear, including gloves, safety glasses, and closed-toe shoes. Handle sharp tools with care and use protective guards or covers when possible. Always use tools in a well-lit area and avoid distractions. Store tools safely after use to prevent accidental injuries.
- Heavy lifting: DIY pond skimmer components can be heavy, especially when working with large ponds. Always use proper lifting techniques to avoid strain or injury. Use lifting aids such as straps or dollies to move heavy objects. If necessary, get assistance from others for lifting and carrying heavy components.
- Falling objects: When working at heights, be mindful of falling objects. Use a ladder or scaffolding that is sturdy and secure. Ensure that all tools and materials are properly secured to prevent them from falling and causing injury. Always wear a safety harness when working at heights.
Safety Tips for a Functional DIY Pond Skimmer
To ensure your DIY pond skimmer is safe and functional, consider these tips:
- Secure installation: Properly secure the skimmer to the pond edge using sturdy brackets or anchors. Ensure that the skimmer is stable and won’t move or fall into the pond. Use appropriate materials and techniques for securing the skimmer based on the pond size and construction materials.
- Proper drainage: Ensure the skimmer has a drainage system that directs water away from the pond and prevents flooding or overflow. Consider using a drainpipe with a filter to prevent debris from entering the drainage system. Install the drainage system at a safe distance from the pond to avoid contamination.
- Regular maintenance: Regularly inspect and clean the skimmer to prevent clogs and ensure proper operation. Clean the skimmer basket and filter regularly to remove debris. Check for any damage or wear and tear and make necessary repairs. Proper maintenance will extend the lifespan of the skimmer and minimize safety risks.
Building a DIY pond skimmer is a rewarding project that can significantly improve your pond’s aesthetics and health. By understanding the different types of skimmers, choosing the right materials, and carefully following the construction steps, you can create a functional and efficient skimmer that keeps your pond sparkling clean. So, grab your tools, gather your materials, and embark on this DIY adventure to create a cleaner, healthier, and more beautiful pond.
Building a DIY pond skimmer can be a rewarding project, keeping your pond clean and healthy. While you’re working on your pond, you might also want to consider tackling an indoor fly trap DIY project, like this one , to keep those pesky flies away. Once you’ve got both projects under control, you can enjoy a beautiful, bug-free outdoor space!


