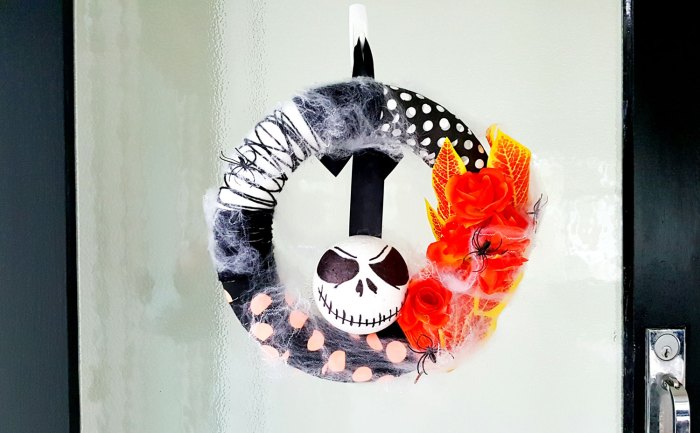
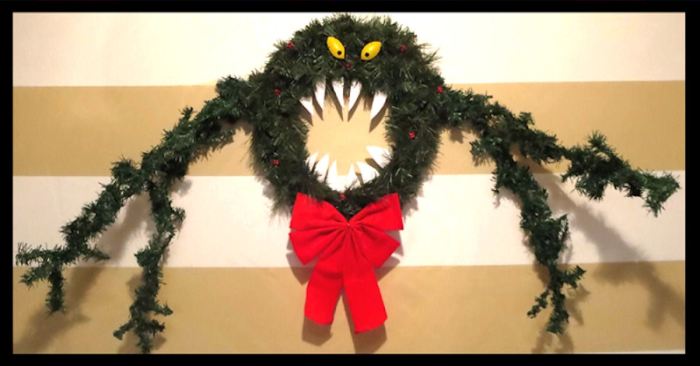
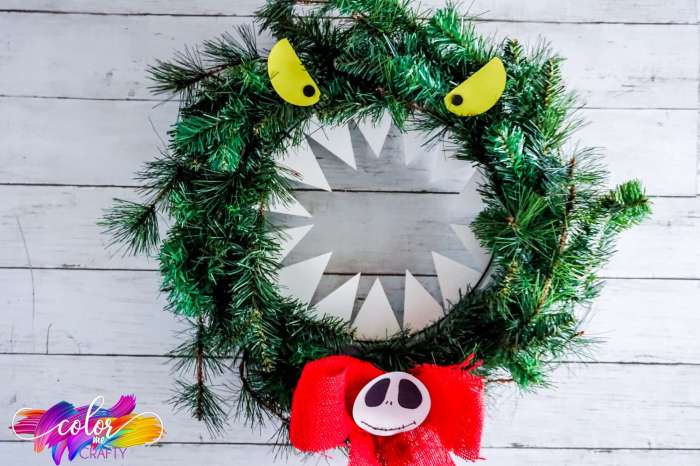
Nightmare Before Christmas Wreath DIY: Embrace the spooky spirit of Halloween and the magic of Christmas with a hauntingly delightful wreath that celebrates Tim Burton’s beloved film. This DIY project is a fun and creative way to bring the whimsical world of Halloween Town into your home decor, adding a unique touch to your holiday celebrations.
Table of Contents
From crafting the base to adding intricate details, this guide will walk you through the steps to create a truly captivating wreath. You’ll learn how to select materials that embody the film’s signature aesthetic, incorporate iconic characters and symbols, and add finishing touches that enhance the overall charm. Whether you’re a seasoned crafter or a beginner, this project offers a rewarding and enjoyable experience, allowing you to showcase your creativity and celebrate the spirit of the holidays.
Adding Character and Detail
Adding character to your Nightmare Before Christmas wreath is all about bringing those beloved characters and elements to life! This can be achieved through thoughtful arrangement of decorations, incorporating iconic characters, and layering textures.
Incorporating Iconic Characters
Creating a truly memorable wreath means showcasing the iconic characters that make The Nightmare Before Christmas so special. Here’s how you can bring them to life:
- Jack Skellington: Use a black and white striped ribbon to represent his iconic suit. You can also add a small black top hat or a cutout of his face to create a focal point.
- Sally: Use scraps of colorful fabric or felt to create her patchwork dress. You can also include a small doll or figurine of Sally for a more detailed representation.
- Oogie Boogie: Use burlap or brown felt to create his menacing form. Add a few googly eyes and a mouth cut from black felt for a truly creepy touch.
Creating Visual Interest
Adding visual interest to your wreath is about layering different textures and sizes of decorations. This creates depth and draws the eye in:
- Varying Textures: Combine smooth ribbon with textured burlap, felt, or even lace. This creates a more dynamic and interesting visual appeal.
- Layering Decorations: Place larger decorations, like a ribbon bow, at the base of the wreath, and then add smaller accents, such as miniature pumpkins or candy corn, around the edges.
- Size Variations: Use a combination of different sizes of ornaments, figurines, or even small toys to add visual interest. This creates a more whimsical and playful look.
Finishing Touches

The finishing touches are where you can truly bring your Nightmare Before Christmas wreath to life. This is the time to add those extra details that make it unique and eye-catching.
Adding Lights
Lights are a great way to add a spooky and festive atmosphere to your wreath. Consider using battery-operated LED lights, which are safe and energy-efficient. You can wrap the lights around the wreath, or use them to highlight specific details, like the eyes of Jack Skellington.
Glitter and Sparkle
Glitter is a fun and easy way to add a touch of magic to your wreath. You can use glitter glue, spray glitter, or even sprinkle loose glitter onto the wreath. For a more dramatic effect, consider using holographic glitter, which shimmers in different colors.
Personal Touches
The best finishing touches are the ones that make your wreath truly personal. You can add your own unique elements, such as:
- Fabric scraps: Use scraps of black, purple, and green fabric to create spiderwebs, bats, or even a tiny version of Jack Skellington’s suit.
- Beads and buttons: Use black beads to create a cobweb effect, or sew on buttons to create the eyes of a spooky creature.
- Miniature figurines: Find small figurines of characters from The Nightmare Before Christmas, such as Jack Skellington, Sally, or Oogie Boogie.
- Hand-painted details: If you’re feeling creative, you can hand-paint details onto the wreath, such as a moon, stars, or even a spooky message.
Safety and Maintenance
Creating a Nightmare Before Christmas wreath is a fun and creative project, but it’s essential to prioritize safety and proper care to ensure your wreath remains beautiful for years to come.
Tool Safety
- Always wear safety goggles when using tools like hot glue guns, cutters, or saws.
- Keep your work area clean and free of clutter to prevent accidents.
- Use tools according to their intended purpose and follow the manufacturer’s instructions.
- Store tools safely and out of reach of children when not in use.
Material Handling
- Handle sharp objects, such as scissors or craft knives, with care.
- Be cautious when working with hot glue or other adhesives. Allow them to cool completely before handling.
- Avoid using flammable materials near open flames or heat sources.
- Properly dispose of any hazardous materials according to local regulations.
Storage and Maintenance
- Store your wreath in a cool, dry place, away from direct sunlight and moisture.
- Avoid storing the wreath in a location prone to dust or pests.
- Periodically dust the wreath with a soft brush or cloth to remove any accumulated dirt.
- If you notice any loose or damaged decorations, repair them promptly.
Weather Protection
- If you plan to display your wreath outdoors, choose weather-resistant materials or apply a sealant to protect it from rain, snow, and sun damage.
- Consider bringing the wreath indoors during severe weather conditions.
- If your wreath is made with delicate materials, it’s best to display it indoors or in a sheltered outdoor location.
Variations and Customization
The beauty of crafting a Nightmare Before Christmas wreath lies in its adaptability. You can easily personalize it to reflect your unique style and preferences. This section explores various ways to customize your wreath, from color schemes and decorative elements to overall design.
Color Schemes
Color schemes play a crucial role in setting the tone of your wreath. The classic Nightmare Before Christmas palette features a vibrant mix of black, purple, green, and orange. However, you can experiment with other color combinations to create a unique aesthetic.
- Subtle Elegance: A combination of deep blues, silver, and white evokes a more elegant and ethereal feel, reminiscent of the moonlit scenes in the film.
- Spooky Chic: Incorporate shades of deep red, black, and silver for a more sinister and gothic vibe.
- Pastel Dreams: Soft pastels like lavender, baby blue, and peach offer a whimsical and playful twist on the classic theme.
Decorative Elements
Beyond the basic wreath frame, you can incorporate a wide range of decorative elements to bring your vision to life.
- Characters: Add felt or fabric cutouts of iconic characters like Jack Skellington, Sally, Oogie Boogie, or Zero. You can also find ready-made ornaments featuring these characters.
- Symbols: Incorporate symbols associated with the film, such as pumpkins, bats, spiderwebs, and the iconic Christmas tree.
- Textures: Introduce different textures to create visual interest. For example, combine smooth felt with rough burlap or textured ribbon.
Overall Design
Consider the overall design of your wreath. You can choose a traditional circular shape or experiment with more unique forms.
- Circular Wreath: The classic circular shape provides a balanced and symmetrical design. This allows for a wide range of decorative elements and creates a cohesive look.
- Asymmetrical Design: For a more whimsical and unconventional look, consider an asymmetrical design. This can be achieved by using a non-circular base or by strategically placing decorative elements to create an unbalanced, yet visually appealing, composition.
- Three-Dimensional Elements: Introduce three-dimensional elements like miniature houses, trees, or even a miniature version of Jack Skellington’s mansion. These additions create a sense of depth and dimension.
Displaying the Wreath: Nightmare Before Christmas Wreath Diy

Now that your Nightmare Before Christmas wreath is complete, it’s time to find the perfect spot to showcase its spooky charm. Consider its size and the overall aesthetic you’re aiming for when choosing a location. You can make it the centerpiece of your Halloween decor or use it to complement other festive elements.
Choosing the Right Location, Nightmare before christmas wreath diy
The size of your wreath will play a crucial role in deciding where it will look best. A smaller wreath might be ideal for a door or a wall, while a larger one could be the focal point of a mantelpiece or a window. Consider the following factors:
- Door: A classic spot for wreaths, especially if your wreath is a standard size. Ensure the wreath doesn’t obstruct the door’s opening.
- Wall: A great option for showcasing a large or intricate wreath. Use hooks or decorative wall hangers for a secure and visually appealing display.
- Mantelpiece: A traditional spot for holiday decor, a wreath can add a festive touch to your fireplace. Make sure the wreath is proportionate to the mantelpiece’s size.
- Window: A wreath placed near a window can create a charming display, especially if it’s backlit by natural light. Choose a window that’s not obstructed by furniture or curtains.
Creating a Festive Ambiance
The right placement can significantly impact the ambiance of your wreath. Here are some tips for making your Nightmare Before Christmas wreath the star of the show:
- Lighting: Use string lights, lanterns, or candles to illuminate the wreath and create a warm and inviting atmosphere. Choose colors that complement the wreath’s theme, such as orange, purple, or black.
- Color Scheme: Coordinate the wreath’s colors with your overall Halloween decor. For a classic look, stick to black, orange, and purple. For a more whimsical touch, incorporate green, blue, or silver.
- Accessories: Add additional Halloween elements to the display, such as pumpkins, bats, or spiderwebs. These accessories can enhance the wreath’s spooky charm and create a more cohesive look.
Incorporating the Wreath into a Broader Theme
Your Nightmare Before Christmas wreath can be the starting point for a cohesive Halloween decor theme. Here are some ideas:
- Tim Burton-inspired decor: Use the wreath as a centerpiece for a Tim Burton-themed Halloween party. Incorporate other elements from his films, such as striped socks, skeletons, and stop-motion animation figures.
- Spooky Garden: Place the wreath on your porch or near your front door to create a spooky welcome for guests. Add pumpkins, cobwebs, and other Halloween-themed decorations to enhance the effect.
- Whimsical Halloween: For a more whimsical take on Halloween, combine the wreath with other playful decorations, such as ghosts, candy corn, and Halloween-themed toys.
Inspiring Ideas and Resources

Creating a Nightmare Before Christmas wreath is a fun and creative way to celebrate the spooky and whimsical spirit of the holiday season. There are endless possibilities for incorporating the characters, themes, and imagery of the film into your wreath. This section will provide a list of inspiring ideas and resources to spark your creativity.
Exploring Theme-Based Ideas
The Nightmare Before Christmas offers a wealth of themes and motifs that can be incorporated into your wreath.
- Characters: Consider featuring your favorite characters like Jack Skellington, Sally, Oogie Boogie, or Zero. You can use fabric scraps, felt, or even miniature figurines to create representations of these iconic characters.
- Setting: Capture the essence of Halloween Town by incorporating elements like pumpkins, bats, cobwebs, and spooky trees.
- Songs and Scenes: Think about memorable songs and scenes from the movie. Perhaps create a wreath inspired by “This Is Halloween” or the “Oogie Boogie” sequence.
- Colors and Patterns: Embrace the film’s signature color palette of black, orange, purple, and green. You can use patterned ribbons, fabrics, or even paint to create a visually striking wreath.
Online Resources and Tutorials
The internet is a treasure trove of inspiration and guidance for crafting projects. Here are some online resources that can help you bring your Nightmare Before Christmas wreath to life:
- Pinterest: Pinterest is an excellent platform for finding a wide variety of crafting ideas, including Nightmare Before Christmas-themed wreaths. You can search for specific characters, themes, or techniques to find inspiration.
- YouTube: YouTube is a great resource for video tutorials. Search for “Nightmare Before Christmas wreath DIY” or “Halloween Town wreath” to find step-by-step instructions from experienced crafters.
- Crafting Blogs and Websites: Many crafting blogs and websites offer creative ideas and tutorials for holiday wreaths. Look for sites that specialize in Halloween or seasonal crafting.
Crafting Communities
Connecting with other crafters can provide valuable support, inspiration, and feedback. Consider joining online crafting communities or forums where you can share your ideas, ask questions, and learn from others.
- Reddit: Reddit has several crafting communities, including r/DIY and r/crafts. You can find discussions, tutorials, and inspiration for a wide range of crafting projects.
- Facebook Groups: Search for Facebook groups dedicated to crafting, Halloween, or even Nightmare Before Christmas enthusiasts. You can connect with other fans and share your projects.
With a little creativity and a touch of spooky charm, you can transform your home into a festive haven with a Nightmare Before Christmas wreath. This DIY project allows you to express your individual style and create a unique piece that captures the essence of the beloved film. From selecting the perfect base to adding the final decorative touches, every step of the process is an opportunity to personalize your wreath and bring it to life. So, gather your materials, unleash your inner artist, and embark on a creative journey that will make your holiday decor truly unforgettable.
Creating a Nightmare Before Christmas wreath is a fun way to embrace the spooky season. If you’re looking for a more whimsical costume idea, consider crafting a DIY scuba diver costume, like this one , for a Halloween party. Once you’ve finished your costume, you can return to your wreath project, adding some festive touches like candy corn or mini pumpkins.


