DIY storm windows offer a cost-effective way to enhance your home’s energy efficiency and comfort, while adding a touch of charm. Whether you’re seeking to reduce heating and cooling costs, block drafts, or simply improve the aesthetics of your windows, building your own storm windows can be a rewarding project.
Table of Contents
This comprehensive guide will walk you through every step of the process, from planning and measuring to building, installing, and maintaining your DIY storm windows. We’ll explore different types of materials and tools, discuss design considerations, and provide safety tips to ensure a successful project.
Planning and Measuring for DIY Storm Windows

Planning and measuring are essential steps in creating DIY storm windows. Accurate measurements are crucial for ensuring that your storm windows fit snugly and provide maximum protection against the elements.
Measuring Existing Windows
Before you begin, gather the necessary tools, including a measuring tape, pencil, and level. You will also need a helper to assist you with holding the tape measure and ensuring accurate measurements. Here’s how to measure your existing windows:
- Measure the width: Hold the tape measure horizontally across the inside of the window frame. Measure the distance between the two vertical sides of the frame, ensuring the tape is level.
- Measure the height: Hold the tape measure vertically along the inside of the window frame. Measure the distance between the top and bottom of the frame, ensuring the tape is level.
- Measure the depth: Measure the depth of the window frame. This will determine the thickness of your storm window.
Determining the Appropriate Size and Type of DIY Storm Windows
The size and type of DIY storm windows you need will depend on the type of windows you have and the level of protection you require.
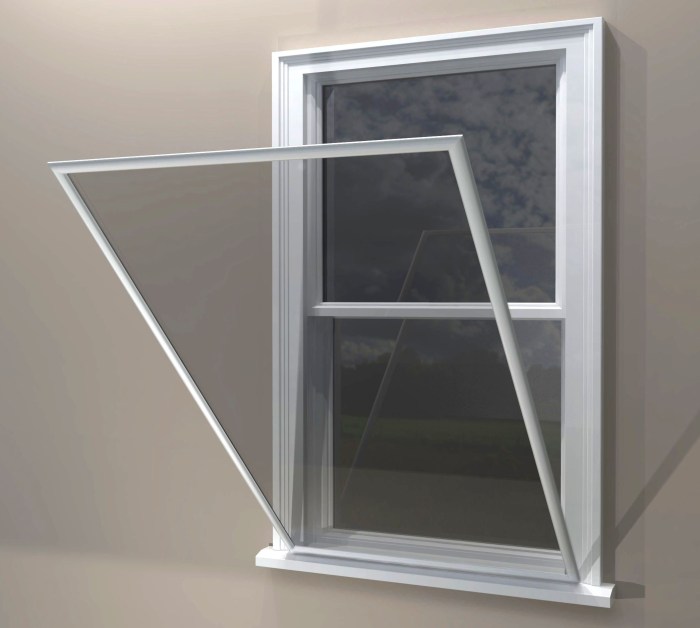
- Single-hung windows: These windows have a single sash that slides up and down. For these windows, you will need a storm window that is slightly smaller than the window opening. This will allow for easy installation and removal.
- Double-hung windows: These windows have two sashes that slide up and down. You will need a storm window that is slightly smaller than the window opening, similar to single-hung windows.
- Sliding windows: These windows slide horizontally. You will need a storm window that is slightly smaller than the window opening to allow for easy sliding.
- Casement windows: These windows swing outward. You will need a storm window that is slightly smaller than the window opening, allowing for the window to swing open.
Building DIY Storm Windows

Now that you have planned and measured for your storm windows, it’s time to start building! There are a few different methods you can use to build DIY storm windows, each with its own advantages and disadvantages. The most common methods include framing, glazing, and installation. We’ll discuss each step in detail, ensuring you have the information you need to build durable and effective storm windows.
Framing
The frame is the foundation of your storm window, providing structural support and holding the glazing in place. It’s essential to choose the right materials and techniques to create a strong and stable frame.
- Choose the Right Wood: Use durable and weather-resistant wood like cedar, redwood, or pressure-treated pine. Avoid softwoods like pine or fir as they are more susceptible to warping and rotting.
- Cut and Assemble the Frame: Cut the wood to size according to your measurements, and join the pieces using strong wood glue and screws or nails. Ensure the corners are square and the frame is sturdy.
- Add Reinforcements: For larger windows, consider adding additional supports or bracing to prevent sagging.
DIY Storm Window Design Ideas
Storm windows offer a great way to enhance your home’s energy efficiency and curb appeal. Beyond their practical benefits, they can also be a canvas for creative expression. With a little ingenuity, you can transform your DIY storm windows into unique design elements that complement your home’s style.
Decorative Elements for DIY Storm Windows
Decorative elements can elevate the aesthetics of your storm windows, transforming them into eye-catching features. Here are some ideas to consider:
- Window Grilles: Simulate the look of traditional divided-light windows by adding decorative grilles to your storm windows. You can create these grilles using wood strips, PVC molding, or even vinyl tape. Paint them in a contrasting color to highlight the design.
- Etched Glass: Etched glass panels can add a touch of elegance and privacy to your storm windows. You can purchase pre-etched glass or create your own designs using etching cream. Consider patterns like geometric shapes, floral motifs, or even your family initials.
- Stained Glass: Incorporate vibrant colors and intricate patterns by using stained glass pieces in your storm windows. This technique can create a stunning focal point, especially when sunlight shines through the glass.
- Frosted Film: Apply frosted film to your storm windows for a subtle, yet stylish, privacy screen. This film diffuses light while still allowing natural light to filter through. You can find frosted film in various patterns and colors.
Using Different Materials for DIY Storm Windows
While traditional wood or aluminum storm windows are popular choices, exploring alternative materials can unlock unique design possibilities and enhance energy efficiency.
- Recycled Materials: Incorporate recycled materials like old windowpanes, salvaged wood, or even discarded plastic bottles to create sustainable and eco-friendly storm windows. This approach not only reduces waste but also adds a rustic charm to your home.
- Acrylic Panels: Acrylic panels are lightweight, durable, and shatter-resistant, making them an excellent choice for storm windows. They are available in various colors and finishes, allowing you to customize the look of your windows.
- Polycarbonate Sheets: Polycarbonate sheets are known for their exceptional strength and impact resistance. They offer excellent insulation and can withstand harsh weather conditions, making them ideal for areas prone to extreme temperatures or high winds.
Customizing the Look of DIY Storm Windows
Tailor the design of your storm windows to complement your home’s existing style and create a cohesive look.
- Matching Exterior Trim: Paint your storm windows to match the color of your home’s exterior trim for a seamless and polished look. You can also use contrasting colors to create visual interest.
- Architectural Details: Incorporate architectural details like moldings, cornices, or decorative brackets to enhance the visual appeal of your storm windows. These elements can add depth and dimension to the overall design.
- Personalized Touches: Add personal touches to your storm windows, such as painted murals, engraved messages, or even small decorative elements that reflect your unique style.
Energy-Efficient Materials and Techniques
Choosing energy-efficient materials and techniques for your DIY storm windows can significantly reduce your heating and cooling costs.
- Insulated Glass: Opt for insulated glass units (IGUs) for your storm windows. These units consist of two or more panes of glass separated by a vacuum or inert gas, creating a barrier that reduces heat transfer. IGUs can significantly improve energy efficiency, especially in colder climates.
- Low-E Coatings: Low-emissivity (Low-E) coatings are applied to the surface of the glass to reflect heat back into the room during winter and keep it out during summer. This technology helps maintain a comfortable indoor temperature while reducing energy consumption.
- Weatherstripping: Use high-quality weatherstripping around the perimeter of your storm windows to seal any gaps and prevent air leakage. This helps prevent drafts and improve insulation, contributing to a more energy-efficient home.
DIY Storm Window Safety Tips
DIY storm windows are a great way to improve your home’s energy efficiency and reduce heating and cooling costs. However, it’s important to prioritize safety when working on any DIY project, and storm window construction is no exception. Following safety tips can help you avoid accidents and injuries while building and installing your storm windows.
Safety Precautions When Handling Tools
- Always wear safety glasses when using power tools, hand tools, and even when working with materials like wood or glass.
- Use the right tool for the job and ensure that all tools are in good working order.
- Always unplug power tools when not in use, and before making adjustments or changing blades.
- Keep work areas clean and free of clutter to prevent tripping or falling.
- Never use tools that are damaged or have missing parts.
- Keep your fingers away from the blade of a saw or other sharp tools.
- Use a work bench or table for cutting and assembling, rather than working on the floor.
- Store tools properly and out of reach of children.
Safety Precautions When Working with Materials
- When working with wood, always use a sawhorse or work bench for support.
- Always wear gloves when handling wood, especially when using power tools.
- Use a dust mask or respirator when working with wood, especially when sanding or cutting.
- When working with glass, use caution as it can shatter easily.
- Wear safety glasses when cutting glass and use a glass cutter designed for the thickness of the glass you are working with.
- Use a glass cutter designed for the thickness of the glass you are working with.
- Never attempt to cut glass on a hard surface like concrete or tile, as this can cause the glass to shatter.
- Always wear gloves when handling glass, especially when working with broken pieces.
- If you are using paint or other chemicals, always follow the manufacturer’s instructions and wear appropriate protective gear.
- Use a well-ventilated area when working with paint or other chemicals.
Safety Precautions When Installing DIY Storm Windows
- Always use a ladder that is in good working order and is the right height for the job.
- Never stand on the top step of a ladder.
- Always have someone hold the base of the ladder when working at a height.
- Use caution when working around electrical wires.
- Make sure that the storm windows are securely fastened to the window frame.
- Use weatherstripping to seal any gaps around the storm windows.
- If you are using screws or nails to install the storm windows, make sure they are long enough to reach through the storm window and into the window frame.
Avoiding Common Accidents and Injuries
- Avoid working on storm windows in wet or icy conditions.
- Avoid working on storm windows while under the influence of alcohol or drugs.
- Avoid working on storm windows if you are feeling tired or unwell.
- Take breaks to avoid fatigue.
- If you are unsure about any aspect of the project, consult a professional.
With a little planning, effort, and the right materials, you can create durable and effective DIY storm windows that will enhance your home’s energy efficiency and curb appeal for years to come. Not only will you save money on energy bills, but you’ll also have the satisfaction of completing a rewarding DIY project.
DIY storm windows are a great way to save energy and reduce noise, and they can be a fun and rewarding project. If you’re looking for a more ambitious DIY project, you might consider building a DIY pallet playhouse for your kids. Just like storm windows, a playhouse can add a lot of value to your property, and it’s sure to be a hit with the little ones.
Of course, DIY storm windows are a much more manageable project, and they can be completed in a weekend.


